


Modular design in chicken coop construction offers numerous advantages, including flexibility, ease of assembly, and the ability to customize based on your specific needs. As a chicken coop supplier, I've seen firsthand how a well - designed modular chicken coop can enhance the lives of both chickens and their owners. In this blog, I'll guide you through the process of making a chicken coop with a modular design.
Understanding Modular Design
Before diving into the construction process, it's crucial to understand what modular design means. A modular chicken coop is composed of separate, pre - fabricated units or modules that can be easily assembled and disassembled. These modules can be designed for different functions, such as a nesting area, a roosting area, and a ventilation section. The beauty of modular design lies in its scalability. You can start with a basic setup and add more modules as your flock grows.
Planning Your Modular Chicken Coop
Assessing Your Flock Size
The first step in planning your chicken coop is to determine the size of your flock. A general rule of thumb is to provide at least 2 - 3 square feet of indoor space per chicken and 8 - 10 square feet of outdoor space per chicken. If you plan to expand your flock in the future, it's wise to build a coop with some extra capacity.
Selecting the Location
Choose a location for your chicken coop that is well - drained, receives plenty of sunlight, and is protected from strong winds. It should also be easily accessible for cleaning and feeding. Consider the proximity to your house for convenience, but also keep in mind the potential for noise and odor.
Designing the Modules
Sketch out the different modules you'll need for your chicken coop. Common modules include:
- Nesting Boxes: These are where your hens will lay their eggs. Each nesting box should be about 12x12 inches and can accommodate one hen at a time.
- Roosting Bars: Chickens prefer to sleep off the ground. Provide roosting bars that are at least 2 inches wide and spaced about 12 inches apart.
- Ventilation Modules: Proper ventilation is essential to keep the air fresh inside the coop and prevent the buildup of moisture and ammonia. You can design ventilation modules with adjustable vents to control the airflow.
Materials and Tools
Materials
- Wood: For the frame and walls of the coop, you can use pressure - treated lumber or untreated wood if you plan to paint or stain it for protection.
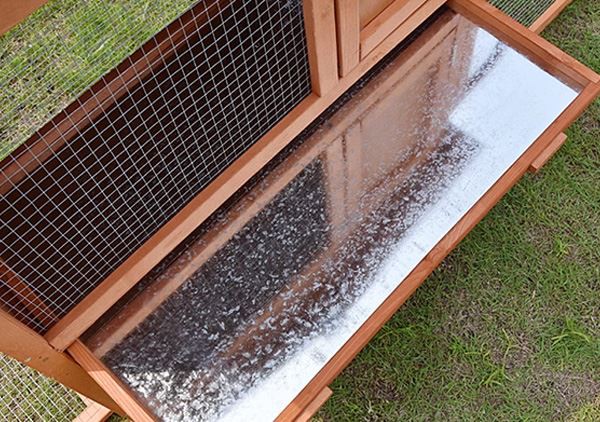
- Wire Mesh: This is used for the sides of the coop to keep predators out while allowing for ventilation.
- Plywood: Use plywood for the floors and roofs of the modules.
- Hardware: You'll need screws, nails, hinges, and latches for assembly.
If you're looking for pre - made options, we offer a variety of high - quality chicken coops, including WPC Chicken Coop, Chicken Coop with Running Cage, and Wooden Chicken Coop.
Tools
- Saw: A circular saw or a handsaw can be used to cut the wood to the desired lengths.
- Drill: This is essential for making holes and driving screws.
- Measuring Tape: Accurate measurements are crucial for a proper - fitting coop.
- Hammer: For nailing and general construction tasks.
Building the Modules
Building the Frame
Start by building the frames for each module. Cut the lumber to the appropriate lengths and assemble them using screws or nails. Make sure the corners are square and the frame is sturdy.
Attaching the Walls
Once the frames are complete, attach the wire mesh or plywood to the sides of the frames. For the wire mesh, use staples or small nails to secure it in place. For plywood, use screws.
Adding the Roof
The roof should be sloped to allow for water drainage. Cut the plywood to the appropriate size and attach it to the top of the frame. You can add shingles or roofing felt for additional protection.
Installing the Nesting Boxes and Roosting Bars
For the nesting boxes, attach them to the inside of the coop at a convenient height for the hens. Line the boxes with straw or shavings. Install the roosting bars at the desired height and make sure they are firmly attached.
Assembling the Coop
Once all the modules are built, it's time to assemble the chicken coop. Start by placing the base module on a level surface. Then, attach the other modules to the base using screws or bolts. Make sure the connections are secure and the coop is stable.
Finishing Touches
Painting or Staining
Painting or staining the coop not only enhances its appearance but also protects the wood from the elements. Choose a non - toxic paint or stain that is safe for chickens.
Adding Accessories
You can add accessories such as feeders, waterers, and perches to make the coop more comfortable for your chickens. Make sure to place them in easily accessible locations.

Maintenance and Care
Regular maintenance is essential to keep your chicken coop in good condition. Clean the coop at least once a week to remove manure and soiled bedding. Check the coop for any signs of damage or wear and make repairs as needed. Inspect the wire mesh for holes and replace it if necessary.
Contact for Purchase and Consultation
If you're interested in purchasing a pre - made modular chicken coop or need more advice on building your own, feel free to reach out to us. We have a team of experts who can assist you in finding the perfect solution for your flock. Our extensive range of products, including WPC Chicken Coop, Chicken Coop with Running Cage, and Wooden Chicken Coop, is designed to meet the diverse needs of chicken owners. Whether you're a beginner or an experienced poultry keeper, we're here to help you create a safe and comfortable home for your chickens.
References
- "The Chicken Coop Handbook" by Gail Damerow
- "Storey's Guide to Raising Chickens" by Gail Damerow