


A well - designed chicken coop is essential for the health and safety of your chickens. Adding a motion - activated light to the chicken coop can provide several benefits, such as deterring predators and helping you check on your chickens at night without disturbing them. As a chicken coop supplier, I'm excited to share with you a step - by - step guide on how to make a chicken coop with a motion - activated light.
Materials and Tools Needed
- For the Chicken Coop:
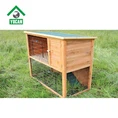
- Wood: You can choose from different types of wood depending on your budget and durability requirements. Our Wooden Chicken Coop is a great option, made from high - quality wood that can withstand various weather conditions.
- Nails, screws, and a hammer or screwdriver for assembly.
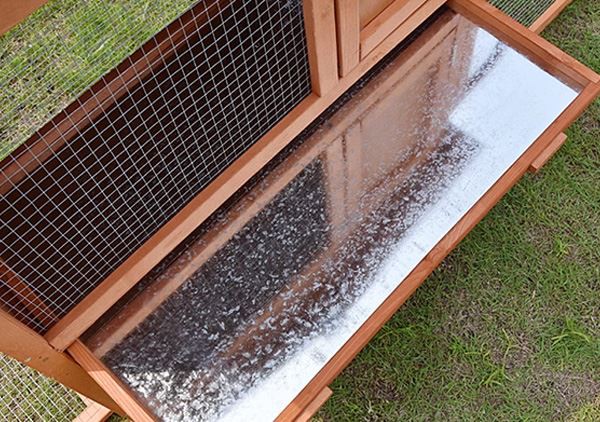
- Wire mesh to cover the windows and ventilation areas to prevent predators from entering.
- Plywood for the floor, walls, and roof.
- Hinges and latches for the doors.
- For the Motion - Activated Light:
- A motion - activated light kit. You can find these at most hardware stores.
- Electrical wiring and connectors. Make sure to follow all electrical safety guidelines when working with wiring.
- A drill and appropriate drill bits for making holes to run the wiring.
Step 1: Design the Chicken Coop
Before you start building, it's important to have a clear design in mind. Consider the number of chickens you plan to keep. A general rule of thumb is to provide at least 2 - 3 square feet of indoor space per chicken. Sketch out the dimensions of the coop, including the location of the nesting boxes, roosting bars, and ventilation areas.
Step 2: Build the Frame
Cut the wood according to your design to create the frame of the chicken coop. Use nails or screws to join the pieces together at the corners. Make sure the frame is square and sturdy. You can refer to the construction of our WPC Chicken Coop for inspiration on a well - structured frame.
Step 3: Add the Walls and Roof
Attach the plywood sheets to the frame to form the walls and roof of the chicken coop. Use nails or screws to secure the plywood in place. Make sure to leave openings for windows and doors. For the roof, you can add a slant to allow rainwater to drain off easily.
Step 4: Install the Wire Mesh
Cut the wire mesh to fit the windows and ventilation areas. Attach the wire mesh using staples or small nails. This will prevent predators such as raccoons, foxes, and snakes from getting into the coop.
Step 5: Build the Nesting Boxes and Roosting Bars
Nesting boxes are where your chickens will lay their eggs. You can build simple wooden boxes and line them with straw or wood shavings. Roosting bars should be placed at a comfortable height for the chickens to perch on at night. Make sure the bars are smooth to prevent injury to the chickens' feet.
Step 6: Install the Doors
Attach the hinges to the doors and the coop frame. Make sure the doors open and close smoothly. Add latches to keep the doors securely closed and prevent predators from opening them.
Step 7: Plan the Location for the Motion - Activated Light
Decide where you want to install the motion - activated light. A good location is near the entrance of the coop or in an area where predators are likely to approach. Make sure there is a power source nearby or plan to run an extension cord if needed.

Step 8: Install the Motion - Activated Light
- First, turn off the power at the main electrical panel to avoid any electrical shocks.
- Use a drill to make holes in the coop where you will run the wiring.
- Connect the wiring from the motion - activated light kit to the power source according to the manufacturer's instructions.
- Mount the motion - activated light fixture on the coop using screws or brackets.
- Test the light by walking in front of the motion sensor to make sure it turns on.
Step 9: Final Touches
- Add a layer of bedding to the floor of the coop, such as straw or wood shavings. This will keep the chickens warm and comfortable.
- Place food and water containers inside the coop. Make sure they are easily accessible to the chickens.
Benefits of a Chicken Coop with a Motion - Activated Light
- Predator Deterrence: The sudden light from the motion - activated light can startle predators, scaring them away from the coop. This can protect your chickens from being attacked at night.
- Safety for You: When you need to check on your chickens at night, the motion - activated light will turn on automatically, allowing you to see inside the coop without disturbing the chickens too much.
- Energy Efficiency: Motion - activated lights only turn on when motion is detected, which means they use less energy compared to traditional lights that are left on all night.
Our Chicken Coop Products
As a chicken coop supplier, we offer a wide range of chicken coops to meet your needs. In addition to the Wooden Chicken Coop and WPC Chicken Coop mentioned earlier, we also have the Chicken Coop with Running Cage. This type of coop provides your chickens with additional outdoor space to exercise and forage, promoting their overall health and well - being.
Contact Us for Purchase and Consultation
If you are interested in purchasing a chicken coop or have any questions about building your own chicken coop with a motion - activated light, we are here to help. Our team of experts can provide you with more information about our products, offer advice on coop design, and assist you in making the right choice for your flock. Whether you are a small - scale backyard chicken keeper or a commercial poultry farmer, we have the solutions for you.
References
- "The Chicken Coop Handbook" by Gail Damerow. This book provides in - depth information on chicken coop design, construction, and maintenance.
- Various hardware store manuals for motion - activated light installation. These manuals offer detailed instructions on how to install and troubleshoot motion - activated lights.